
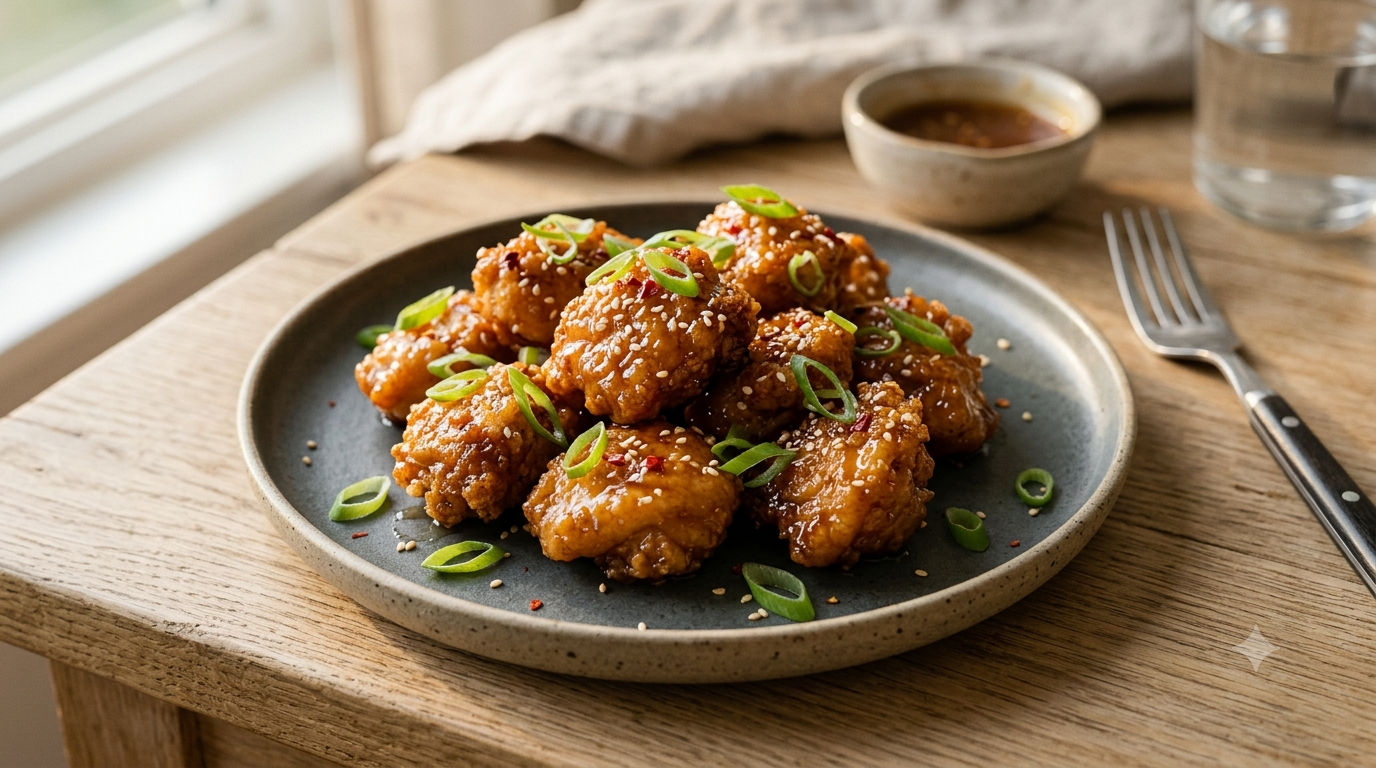
There is one dinner problem that used to drive me crazy. I’d spend time getting chicken perfectly crisp, then the second I added sauce, all that crunchy coating turned soft. After testing this recipe more times than I can count, I found a simple fix that changed everything.
These crispy honey garlic chicken bites are built differently. The chicken gets a light coating that fries into a thin, shatter-crisp shell instead of a thick, heavy crust. The honey garlic sauce is reduced separately until glossy, then tossed with the chicken at the very last second. The result is sticky, sweet, savory chicken that still has a satisfying crunch with every bite. It’s the recipe I make whenever I want takeout flavors without the mystery ingredients or soggy leftovers.
Quick Facts
| Recipe Detail | Information |
| Prep Time | 20 minutes |
| Cook Time | 15 minutes |
| Total Time | 35 minutes |
| Calories per Serving | Approximately 445 calories |
| Difficulty Level | Easy |
| Servings | 4 |
| Culinary Origin | Asian-American Inspired |
Why This Recipe Works
I’ve made countless versions of honey garlic chicken over the years, and the biggest lesson I’ve learned is that crispness depends more on moisture control than on the coating itself.
Instead of using flour alone, I combine cornstarch with a small amount of flour. Cornstarch creates tiny bubbles during frying, producing an extra-light crust that stays crisp longer. The flour adds enough structure so the coating doesn’t crack off.
Temperature matters just as much.
I fry the chicken at 350°F (177°C) because it’s hot enough to seal the coating quickly without burning the garlic later in the sauce. If the oil is much cooler, the coating absorbs grease. If it’s hotter, the outside browns before the chicken finishes cooking.
The sauce also gets special treatment.
Rather than simmering everything together, I reduce the sauce until it’s thick enough to coat the back of a spoon. Only then do I toss the chicken for about 20 seconds. That short contact time gives every bite a glossy finish without soaking the crust.
Ingredients With Purpose
| Ingredient | Amount | Why It’s Here |
| Boneless skinless chicken breasts | 2 pounds, cut into 1-inch pieces | Lean protein that cooks quickly |
| Kosher salt | 1 teaspoon | Seasons the meat evenly |
| Black pepper | ½ teaspoon | Mild warmth |
| Garlic powder | 1 teaspoon | Adds flavor beneath the coating |
| Cornstarch | 1 cup | Creates an ultra-crispy crust |
| All-purpose flour | ½ cup | Gives the coating stability |
| Large eggs | 2 | Helps the coating stick |
| Neutral frying oil | About 4 cups | High smoke point for frying |
| Honey | ½ cup | Sweet base for the glaze |
| Low-sodium soy sauce | ¼ cup | Adds savory depth |
| Fresh garlic | 5 cloves, finely minced | Signature garlic flavor |
| Rice vinegar | 2 tablespoons | Balances sweetness |
| Unsalted butter | 2 tablespoons | Adds richness and shine |
| Sesame oil | 1 teaspoon | Nutty aroma |
| Red pepper flakes | ¼ teaspoon (optional) | Gentle heat |
| Sesame seeds | 1 tablespoon | Crunch and garnish |
| Green onions | 2, thinly sliced | Fresh finish |
Step-by-Step Cooking Instructions
Prepare the Chicken
Pat every piece of chicken completely dry with paper towels.
This small step makes a huge difference. Dry chicken holds the coating better and browns faster.
Season the chicken with the salt, pepper, and garlic powder. Let it rest for about 10 minutes while you prepare the coating.
Make the Crispy Coating
Whisk together the cornstarch and flour in a shallow bowl.
Beat the eggs in another bowl until smooth.
Dip each chicken piece into the egg, letting the extra drip away, then coat thoroughly in the cornstarch mixture.
Place the coated pieces on a baking sheet while you finish the batch. This short rest allows the coating to cling tightly during frying.
Fry Until Deep Golden
Heat the oil to 350°F in a heavy Dutch oven or deep skillet.
Working in small batches, fry the chicken for 4 to 5 minutes, turning occasionally.
The coating should become light golden and crisp. The chicken should reach an internal temperature of 165°F.
Transfer each batch onto a wire rack instead of paper towels. Air can circulate underneath, keeping the crust crisp.
Build the Honey Garlic Sauce
While the chicken rests, melt the butter in a saucepan over medium heat.
Once it foams and smells slightly nutty, stir in the minced garlic.
Cook for about 30 seconds.
The garlic should smell sweet and fragrant but stay pale. Burned garlic turns bitter very quickly.
Add the honey, soy sauce, rice vinegar, sesame oil, and red pepper flakes.
Simmer gently for 3 to 4 minutes.
The bubbles will become slower and slightly thicker. Drag a spoon across the bottom of the pan. If the sauce leaves a clean trail for a second before flowing back together, it’s ready.
Coat the Chicken
Place the hot chicken into a large mixing bowl.
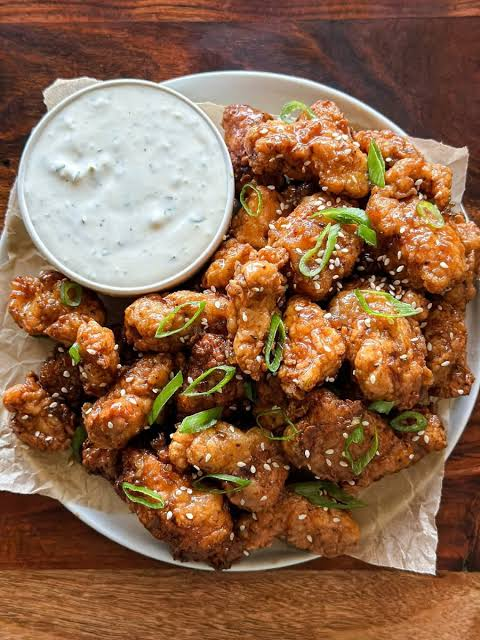
Pour the warm sauce over the chicken and toss gently for 15 to 20 seconds.
Every piece should look shiny without dripping excess sauce.
Sprinkle with sesame seeds and sliced green onions before serving.
Serve Immediately
These crispy honey garlic chicken bites are best served while the coating still crackles.
I love serving them with steamed jasmine rice, roasted broccoli, stir-fried green beans, or a crisp cucumber salad that cools down the sweet garlic glaze.
Nutrition Breakdown
| Nutrient | Per Serving (Approximate) |
| Calories | 445 |
| Protein | 34g |
| Carbohydrates | 31g |
| Fat | 21g |
| Saturated Fat | 5g |
| Fiber | 1g |
| Sugar | 18g |
| Sodium | 640mg |
Nutrition values are estimates and will vary depending on exact ingredients and frying absorption.
Pro Tips & Common Mistakes to Avoid
1. Don’t crowd the fryer.
Adding too much chicken at once drops the oil temperature below 325°F. The coating starts absorbing oil before it crisps, leaving greasy chicken.
2. Dry chicken is your best friend.
Even a small amount of surface moisture creates steam under the coating. That steam pushes the crust away from the meat.
3. Mince the garlic evenly.
Large garlic chunks cook slower than tiny ones. Uneven pieces can leave some garlic raw while others burn.
4. Use a wire rack after frying.
Paper towels trap steam underneath the chicken. The bottom loses its crisp texture within minutes.
5. Wait until serving before adding sauce.
Even the best coating eventually softens if it sits in sauce too long. Toss only what you’ll eat right away.
6. Taste the sauce before coating.
Different honey varieties vary in sweetness. Clover honey is mild, while wildflower honey can be stronger. Adjust with another splash of rice vinegar if needed.
7. Monitor oil with a thermometer.
Guessing the temperature often leads to uneven cooking. A simple digital thermometer removes the guesswork.
Variations & Substitutions
Gluten-Free
Replace the flour with gluten-free all-purpose flour and use certified gluten-free soy sauce or tamari.
Extra Spicy
Mix one tablespoon of sriracha or one teaspoon of chili crisp into the finished sauce.
Air Fryer Version
Spray the coated chicken generously with cooking oil.
Cook at 400°F for 10 to 12 minutes, flipping halfway through. Cook until the coating is crisp and the internal temperature reaches 165°F.
Baked Version
Arrange coated chicken on a lightly greased wire rack over a baking sheet.
Bake at 425°F for 18 to 22 minutes, turning once halfway through.
Chicken Thigh Option
Boneless thighs stay juicier and develop even deeper flavor. Increase cooking time by about one minute if the pieces are larger.
Storage and Reheating Guide
Refrigerator
Store leftovers in an airtight container for up to 3 days.
If possible, keep extra sauce separate from the fried chicken before combining.
Freezer
Freeze the fried chicken without sauce for up to 2 months.
Place cooled pieces on a baking sheet first until frozen solid, then transfer them into freezer bags.
Reheating
For the crispiest results, bake at 375°F for 8 to 10 minutes or air fry at 375°F for 5 to 6 minutes.
Warm the sauce separately and toss everything together just before serving.
Avoid microwaving whenever possible. The steam softens the coating quickly.
Frequently Asked Questions
Can I make crispy honey garlic chicken bites ahead of time?
Yes. Fry the chicken and prepare the sauce separately. Refrigerate both, then reheat the chicken in the oven or air fryer before tossing it with freshly warmed sauce.
Why isn’t my chicken staying crispy?
The most common causes are oil that’s too cool, adding sauce too early, or draining on paper towels instead of a wire rack.
Can I use frozen chicken?
Yes, but thaw it completely first. Pat it dry thoroughly before coating. Extra moisture prevents proper browning.
What’s the best oil for frying?
Neutral oils with high smoke points work best, including peanut oil, vegetable oil, canola oil, or avocado oil.
Can I double this recipe?
Absolutely. Fry in separate batches to keep the oil temperature steady. You can double the sauce easily without changing the cooking method.
Crispy Honey Garlic Chicken Bites Worth Making Again
These crispy honey garlic chicken bites have earned a permanent place in my weeknight dinner rotation because they deliver everything I want in one bowl: crunchy chicken, a glossy honey garlic glaze, and bold flavor without complicated techniques. The little details—drying the chicken, keeping the oil at the right temperature, and tossing with the sauce only at the end—are what make the difference between good and unforgettable.
If you give this recipe a try, I’d love to hear how it turned out. Leave a comment with your favorite side dish, any creative twists you made, or a tip you discovered along the way. Your kitchen stories always inspire the next batch.
YOU ALSO LIKE TO READ BEST NEAR ME: Best Chuflay Cocktail Near Me