
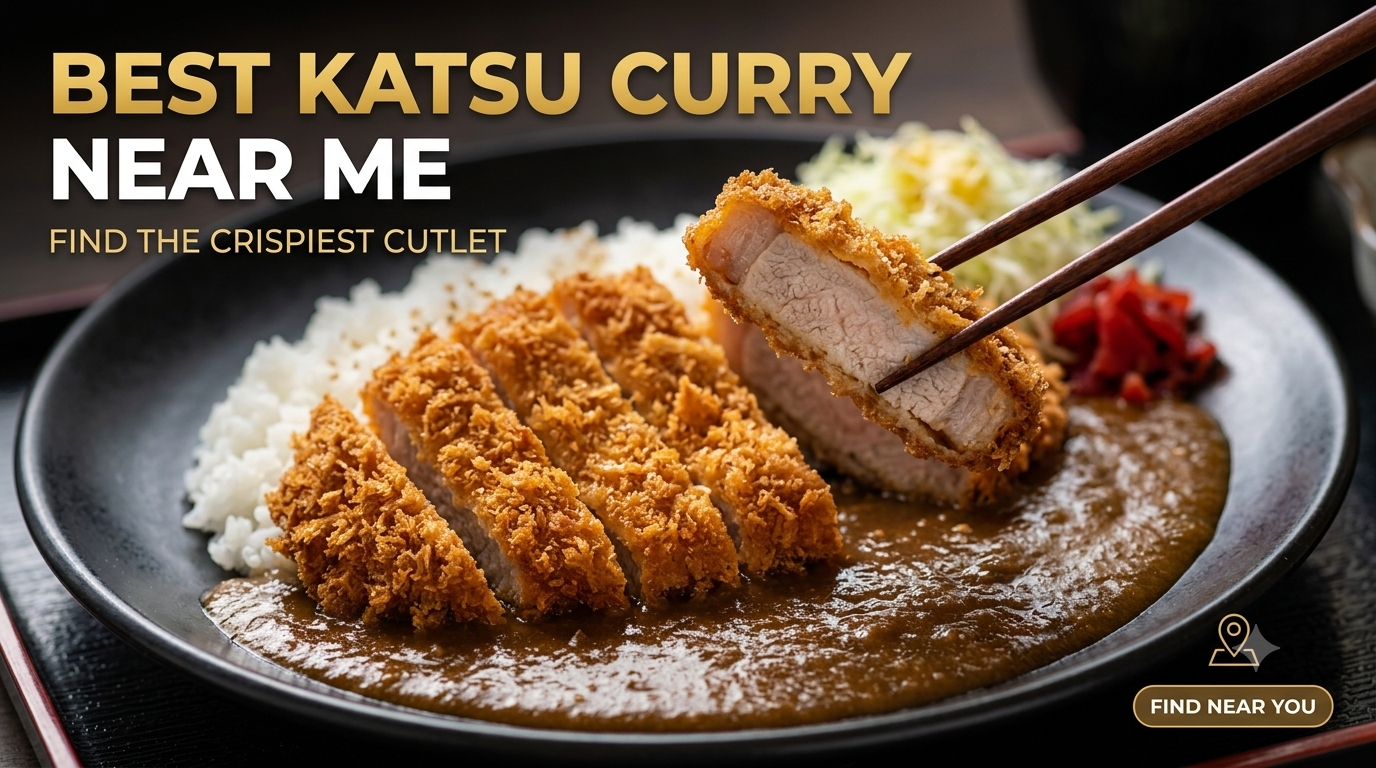
A Crispy Cutlet and Rich Curry Beat Takeout Every Time
The search for the Best Katsu Curry Near Me usually starts the same way for me. It’s cold outside, I’m craving something warm, and every restaurant is either too far away or the delivery time keeps climbing. After one too many soggy takeout cutlets, I decided to master it at home. Katsu Curry
That turned out to be one of the best kitchen projects I’ve ever tackled. A perfectly crunchy chicken cutlet resting over fluffy rice with a silky Japanese curry isn’t difficult once you understand the little details that matter. The smell of sweet onions slowly caramelizing, the gentle warmth of curry powder blooming in butter, and that first crackle as the panko- Katsu Currycoated chicken comes out of the oil easily rivals my favorite Japanese restaurants. If you’ve been searching for the Best Katsu Curry Near Me, this homemade version might become your new favorite destination.
Quick Facts Overview
| Detail | Information |
| Prep Time | 25 minutes |
| Cook Time | 40 minutes |
| Total Time | 1 hour 5 minutes |
| Calories per Serving | About 720 |
| Difficulty Level | Moderate |
| Servings | 4 |
| Culinary Origin | Japanese (Yōshoku Cuisine) |
Why This Recipe Works
After making this recipe dozens of times, I found that success comes down to temperature control and patience instead of fancy ingredients.
I cook the onions low and slow for about 15 minutes before adding the carrots. That gentle cooking releases their natural sweetness without burning them. The curry ends up tasting deeper and richer without needing extra sugar.
The chicken also gets special treatment. I flatten each breast to an even ½-inch thickness so it cooks evenly. Thick spots stay juicy while thin areas don’t dry out.
My favorite trick is frying at 340°F to 350°F. That’s hot enough to create a crisp golden crust while keeping the chicken moist inside. The panko turns beautifully crunchy instead of dark brown before the meat finishes cooking.
Finally, I let the curry simmer for about 20 minutes. During that time, the potatoes soften, the sauce thickens naturally, and every bite tastes balanced rather than rushed.
Ingredients With Purpose
| Ingredient | Amount | Why It’s Here |
| Chicken breasts | 2 large, halved into 4 cutlets | Lean, juicy protein |
| Salt | 1 teaspoon | Seasons the chicken throughout |
| Black pepper | ½ teaspoon | Mild warmth |
| All-purpose flour | 1 cup | Helps the egg stick evenly |
| Large eggs | 2 | Creates the coating layer |
| Panko breadcrumbs | 2 cups | Signature crispy texture |
| Neutral oil | About 5 cups | Even frying without strong flavor |
| Unsalted butter | 2 tablespoons | Rich base for curry |
| Yellow onions | 2 medium, sliced | Sweetness and body |
| Carrots | 2 medium, sliced | Natural sweetness |
| Yukon Gold potatoes | 2 medium, cubed | Creamy texture |
| Garlic | 3 cloves, minced | Savory depth |
| Fresh ginger | 1 tablespoon, grated | Bright warmth |
| Curry powder | 2 tablespoons | Classic Japanese curry flavor |
| Garam masala | 1 teaspoon | Adds complexity |
| Chicken broth | 3 cups | Builds the sauce |
| Soy sauce | 1 tablespoon | Umami richness |
| Honey | 1 tablespoon | Balances spices |
| Worcestershire sauce | 2 teaspoons | Tangy depth |
| Cornstarch | 1 tablespoon mixed with 2 tablespoons water | Thickens the curry |
| Cooked jasmine rice | 4 cups | Traditional serving base |
| Fresh parsley or green onions | Optional | Fresh finish |
Step-by-Step Cooking Instructions
Step 1: Prepare the Chicken
Place each chicken breast between two sheets of plastic wrap.
Using a meat mallet or rolling pin, gently pound until each piece measures about ½ inch thick. Season both sides with the salt and pepper.
This simple step makes a huge difference. Every bite cooks evenly, and the cutlet stays tender.
Step 2: Bread the Cutlets
Set up three shallow dishes.
The first holds flour.
The second holds beaten eggs.
The third holds panko breadcrumbs.
Press the chicken firmly into the panko instead of lightly coating it. I gently pat the crumbs onto every surface. That creates the thick, crunchy shell Japanese katsu is known for.
Let the breaded chicken rest for 10 minutes before frying. The coating sticks much better. Katsu Curry
Step 3: Build the Curry
Melt butter in a Dutch oven over medium-low heat . Katsu Curry
Add the onions.
Cook them for about 15 minutes, stirring every couple of minutes until they become soft and lightly golden. They should smell sweet instead of sharp. Katsu Curry
Add the garlic and ginger.
Cook for 30 seconds until fragrant.
Stir in the curry powder and garam masala. Cook for another minute until the spices become aromatic.
Add carrots, potatoes, broth, soy sauce, Worcestershire sauce, and honey.
Bring everything to a gentle boil.
Reduce to low heat.
Cover and simmer for 20 minutes until the potatoes slide easily off a fork.
Stir in the cornstarch slurry.
Simmer another 3 minutes until the sauce coats the back of a spoon. Katsu Curry
Step 4: Fry the Chicken
Heat the oil to 345°F.
Carefully lower one or two cutlets into the oil without overcrowding.
Cook each side for about 3 to 4 minutes.
The crust should become deep golden brown while the chicken reaches 165°F internally.
Transfer the finished cutlets onto a wire rack instead of paper towels. Air circulation keeps the crust crisp. Katsu Curry
Step 5: Slice and Serve
Slice each cutlet into strips using a sharp knife.
Spoon hot rice onto each plate.
Ladle the curry beside the rice rather than directly over the chicken. That keeps the crust crunchy.
Lay the sliced katsu on top.
Scatter chopped green onions or parsley over everything for fresh color.
Nutrition Breakdown
| Nutrient | Per Serving |
| Calories | 720 |
| Protein | 42g |
| Carbohydrates | 58g |
| Fat | 34g |
| Saturated Fat | 8g |
| Fiber | 5g |
| Sugar | 9g |
| Sodium | 840mg |
Pro Tips & Common Mistakes to Avoid
1. Don’t Skip Resting the Breaded Chicken
Fresh breadcrumbs fall off easily during frying. Ten minutes of resting helps the flour and egg bond together.
2. Use Panko Instead of Regular Breadcrumbs
Regular breadcrumbs absorb more oil.
Panko traps tiny air pockets that stay crispy much longer.
3. Keep the Oil Between 340°F and 350°F
Oil below 325°F makes greasy cutlets.
Oil above 360°F burns the coating before the chicken finishes cooking.
A thermometer removes all the guesswork.
4. Cook the Curry Before Frying
The curry stays piping hot while you fry.
Freshly fried katsu tastes best within minutes of leaving the oil.
5. Don’t Crowd the Pot
Adding too many cutlets lowers the oil temperature quickly.
Fry only one or two pieces at a time for the crispiest coating.
6. Taste Before Adding Salt
Japanese curry blocks and soy sauce vary in saltiness. Always taste the finished sauce first.
Variations & Substitutions
Pork Katsu: Replace chicken with boneless pork loin pounded to ½ inch thick.
Vegan Version: Use extra-firm tofu or breaded eggplant with vegetable broth.
Gluten-Free: Choose gluten-free flour, tamari, and gluten-free panko.
Extra Spicy: Stir in one teaspoon of chili paste or cayenne during the last five minutes.
Lighter Version: Bake the breaded chicken at 425°F for 20 minutes, flipping halfway, or cook it in an air fryer at 390°F for 14 minutes.
Storage and Reheating Guide
Refrigerator
Store curry and chicken separately in airtight containers for up to 4 days.
Keeping them apart preserves the crispy coating.
Freezer
Freeze curry for up to 3 months.
Freeze cooked katsu individually on a baking sheet before transferring to freezer bags.
Reheating the Curry
Warm gently in a saucepan over medium-low heat.
Add 2 to 3 tablespoons of broth if the sauce becomes too thick.
Reheating the Katsu
Bake at 375°F for 10 to 12 minutes on a wire rack.
Avoid microwaving whenever possible since the coating softens quickly.
Frequently Asked Questions
What makes Japanese katsu curry different from Indian curry?
Japanese curry is sweeter, thicker, and milder. It uses flour-based roux and cooked vegetables to create a smooth, comforting sauce rather than the spice-forward style found in many Indian curries.
Can I make katsu curry ahead of time?
Yes. Prepare the curry one day ahead since its flavor improves overnight. Fry the chicken just before serving for maximum crunch.
What’s the best oil for frying katsu?
Neutral oils like canola, vegetable, peanut, or sunflower oil work best because they have high smoke points and don’t overpower the delicate breading.
Why is my katsu coating falling off?
The chicken may have been too wet, or you skipped the resting time after breading. Press the panko firmly into the meat and let it rest for 10 minutes before frying.
Is homemade better than searching for the Best Katsu Curry Near Me?
For me, absolutely. Once you learn the technique, you control every ingredient, adjust the seasoning exactly how you like it, and enjoy a cutlet that’s fresh from the fryer instead of sitting in a takeout container.
Bring Japanese Comfort Food to Your Kitchen
The next time you’re searching for the Best Katsu Curry Near Me, remember that your own kitchen can deliver something even better. Crispy chicken, silky curry, and perfectly steamed rice create one of the most satisfying comfort meals you can make at home.
If you try this recipe, I’d love to hear how it turned out. Leave a comment with your favorite variation, share your cooking tips, or tell me whether you went with chicken, pork, or a vegetarian twist. Your kitchen story might inspire someone else’s next delicious dinner.
U ALOS LIKE TO READ BEST: Best Arroz Con Pollo Cubano Near Me